| Featured Missions | Slooh 1000 | Constellations | Advanced Mission | Member Mission Info |
Featured Missions
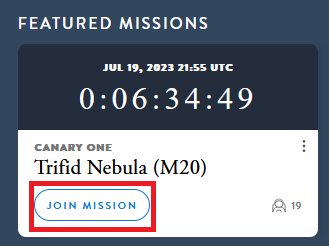
This is a list of preset missions to featured objects that are easy to join. Scroll down to "Missions." Select the "Join Mission" button to be added to the mission roster of any of the featured objects.
Slooh 1000
To view an object in the Slooh 1000, select the Observatory Icon in the upper right-hand corner of the screen and click on "Mission Setup" in the sidebar. Alternatively, you can select the "Missions" tab from your dashboard and click the "Mission Setup" button.
Once in the Mission Setup screen:
- Select the Slooh 1000 tab

- Choose a category and an object.
- After you have the desired setup, select "Preview" to review your mission setup.
- Choose "Schedule Mission" when ready.
We are always looking for great objects to add to the Slooh 1000. If you want to suggest a new Slooh 1000 object, send us the following information:
- Object Name.
- Object Designation (usually catalog number).
- Description.
- Why do you think it's worthy of the Slooh 1000?
- An image of the object you've captured.
Constellation
- Select the "Constellation" tab.

- Choose a category and an Object.
- After you have the desired setup, select "Preview" to review your mission setup.
- Choose "Schedule Mission" when ready.
Advanced Missions - Catalog and Coordinate
You can set up your mission in different ways. First, select "Mission Setup" and choose from one of the following options:
Catalog:
-
- Select the "Catalog" tab.
- Choose a catalog from the drop-down menu.
- Enter a designation. Choose "Check Visibility".
- Select your Image Processing preset.
- Once you have a visible object, select "Preview" to review your mission setup.
- Choose "Schedule Mission" when ready.
- Note: When scheduling an Advanced Mission, you will also see a button labeled "Hold For One Hour." Selecting this allows you to "Hold" a mission slot for one hour without choosing a target. If a target isn't chosen within an hour, the mission slot is released.
Coordinate:
-
- Select the "Telescopes" tab.
- Choose which telescope you want to use.
- Select an open time slot or join an existing mission.
- If you choose your time slot, click on the "By Coordinates" tab.
- Use the drop-down menu to select the object type.
- Fill in the coordinates.
- Enter target name (this is optional).
- Select an appropriate image processing preset.
- Check visibility. If the object is visible, select "Preview" to review your mission set-up.
- Choose "Schedule Mission" when ready.
Note: The above methods are a part of "Advanced Missions," and not all account types will be able to use these methods.
Member Mission Info
- When I Use My Mission Slots, Do They Renew?
Yes. Missions renew automatically after use and can immediately be used again.
Previous Article: Observatories. Next Article: Viewing The Live Telescopes.